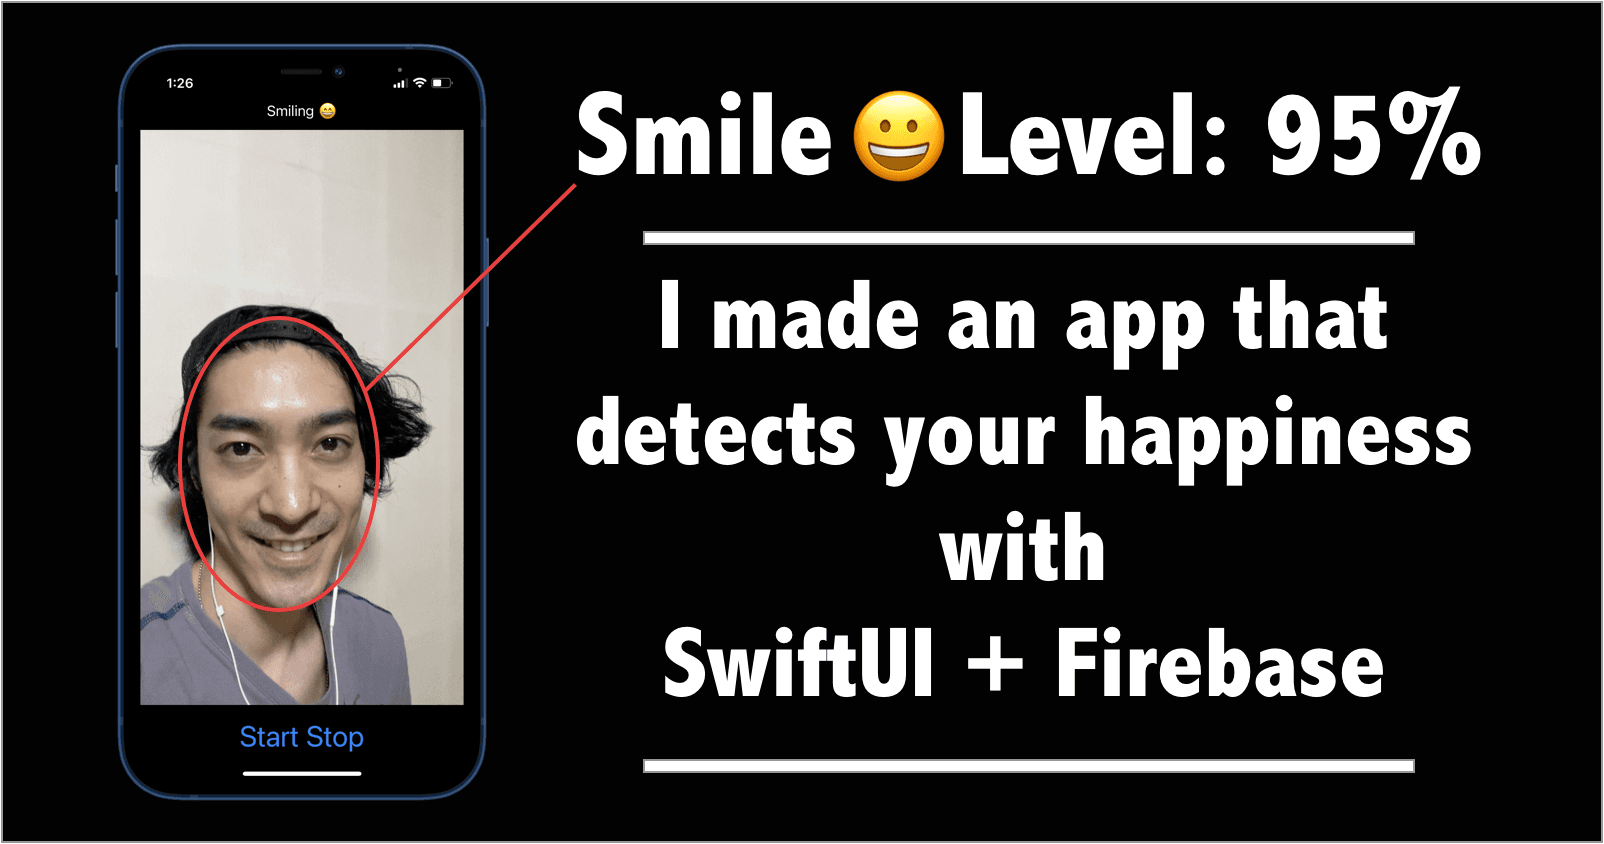
I made an app that detects your happiness using Machine Learning.
It can be easily done by Firebase ML Kit.
COVID-19 crisis has changed working environments drastically as a lot of people are working remotely. I believe many companies will still adopt remote working even after things back to normal.
Since then, I've seen a lot of new teleconferencing services and some of them can detect people's emotions and voices during the teleconference.
The trend convinced me to create one for myself so I made a simple iOS app that detects people's emotions using Firebase ML Kit.
Prerequisite:
・Google account for making a Firebase project
・Install Cocoapods
Step1. Create a Firebase project and install ML Kit using Cocoapods into XCode project
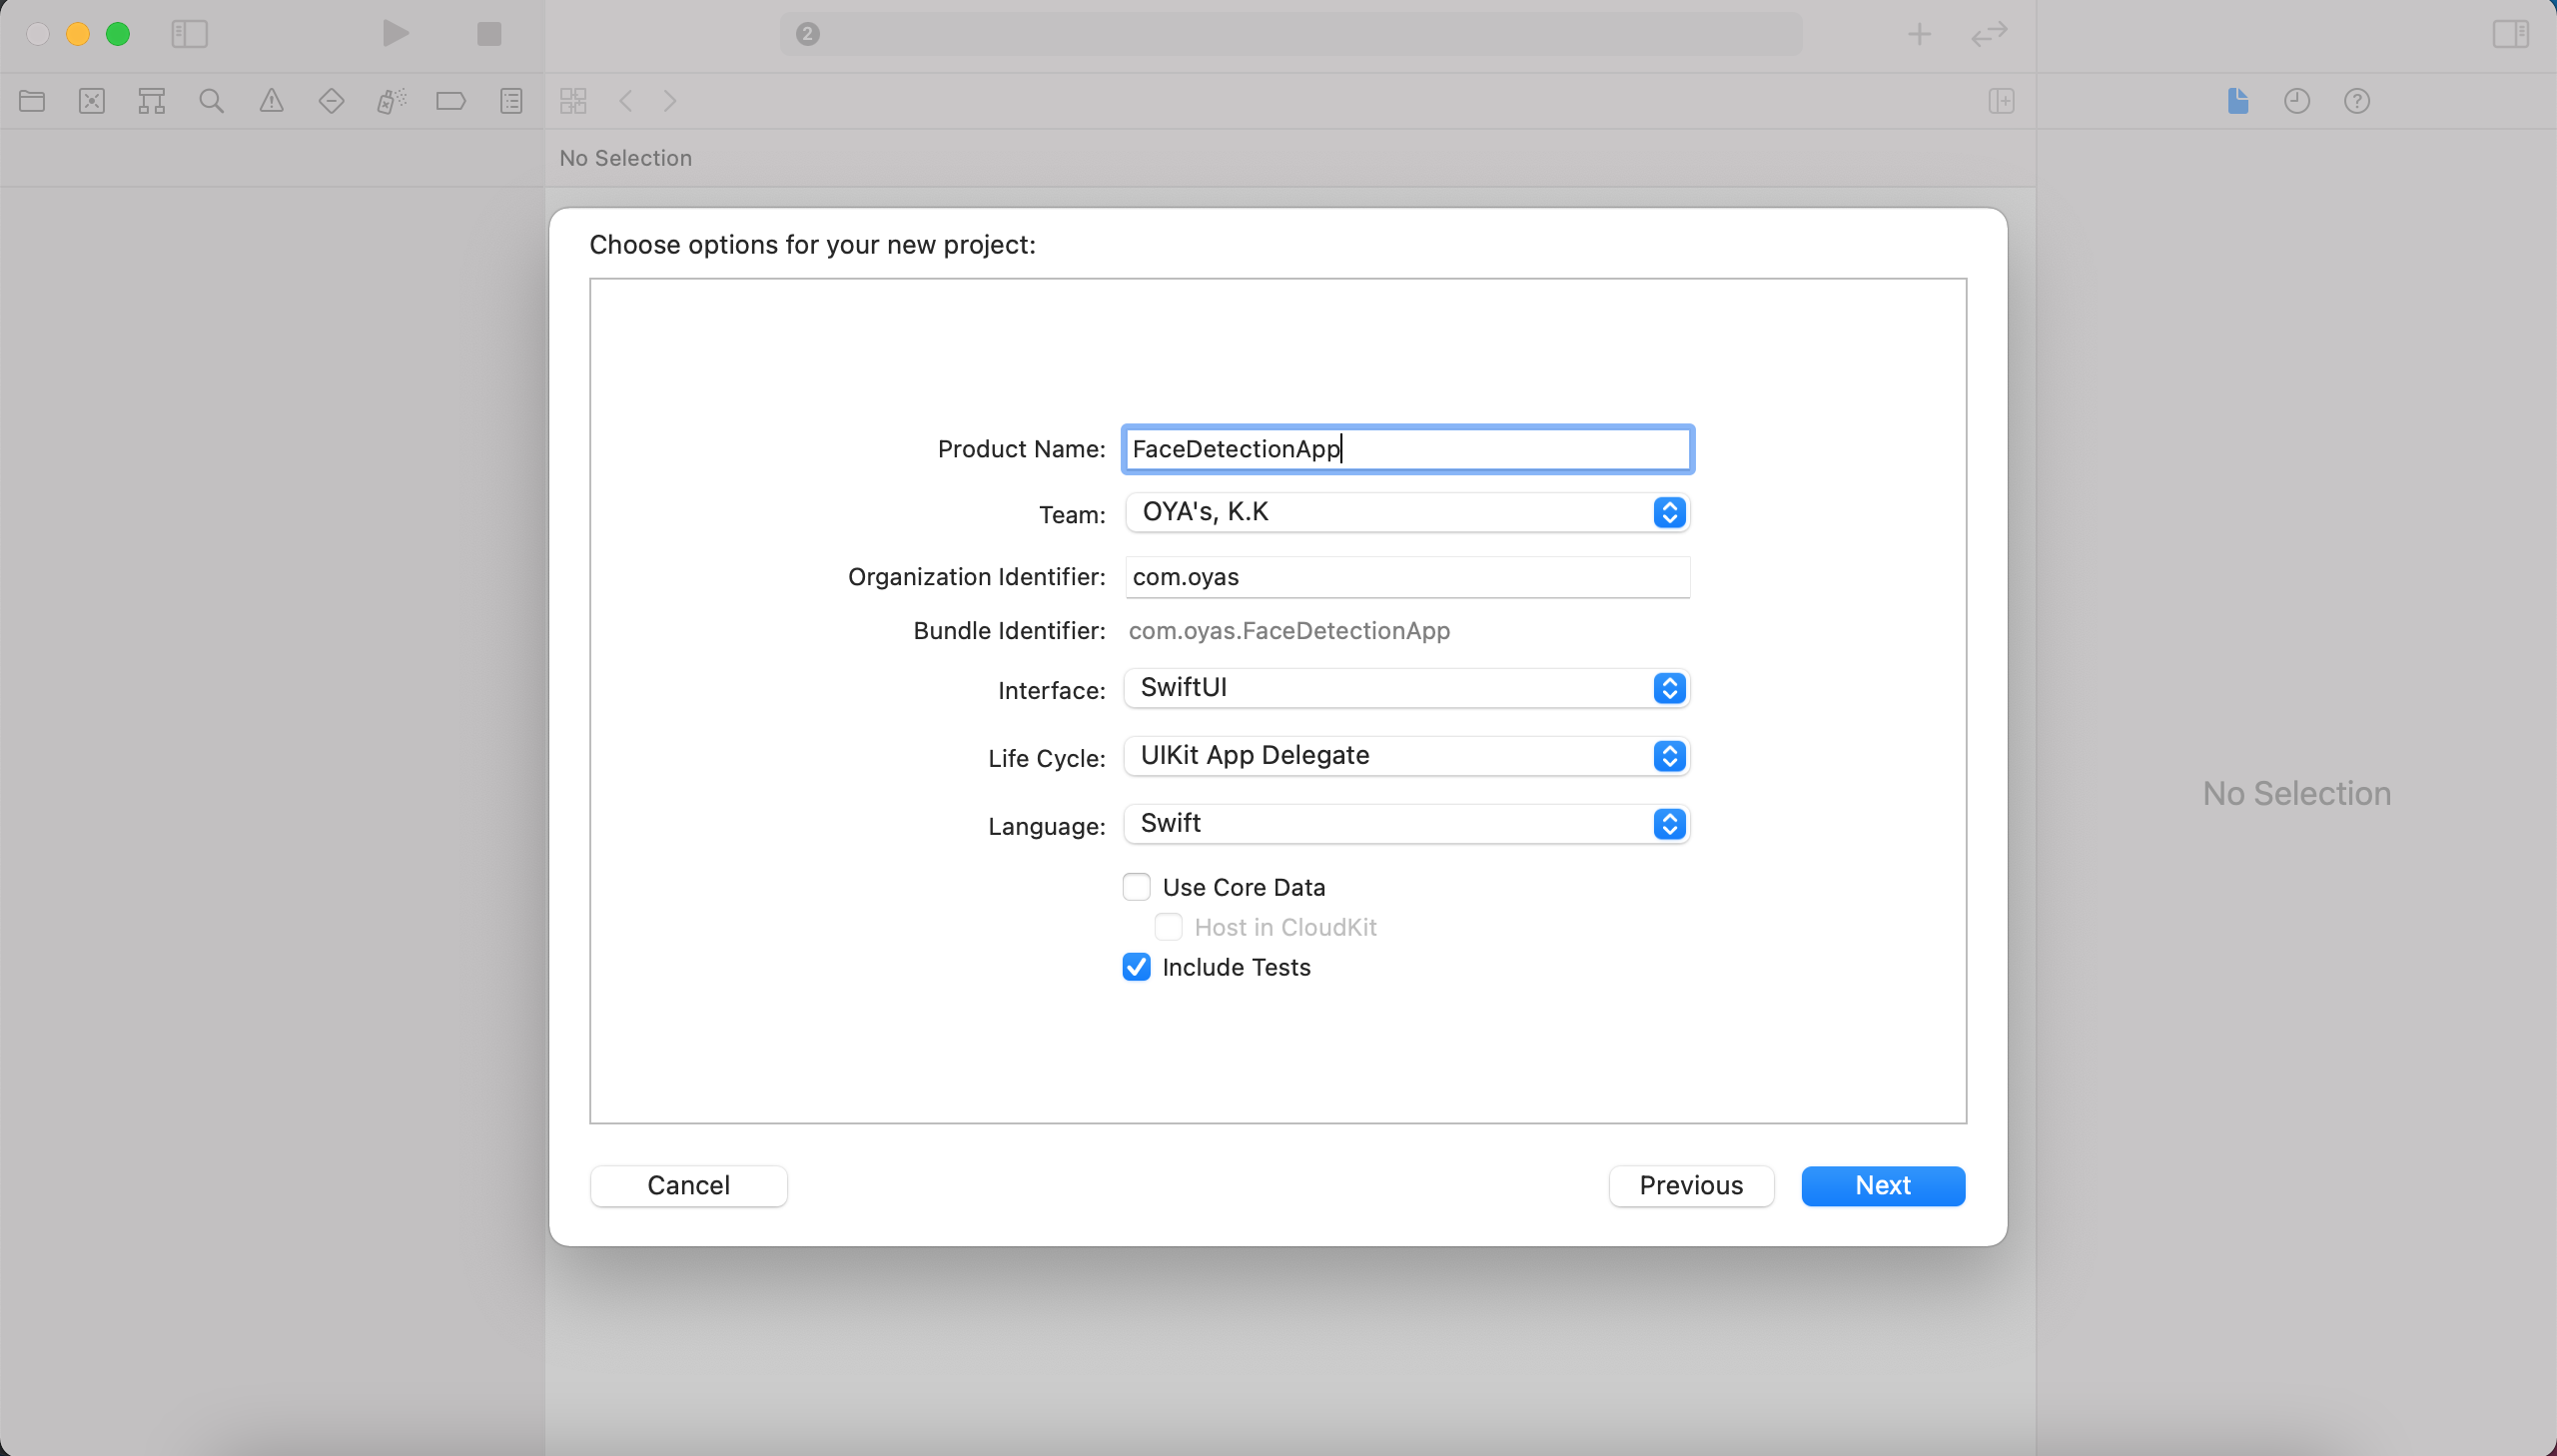
1 - Make a new Xcode project.
You can name this project whatever you want but I name it "FaceDetectionApp".
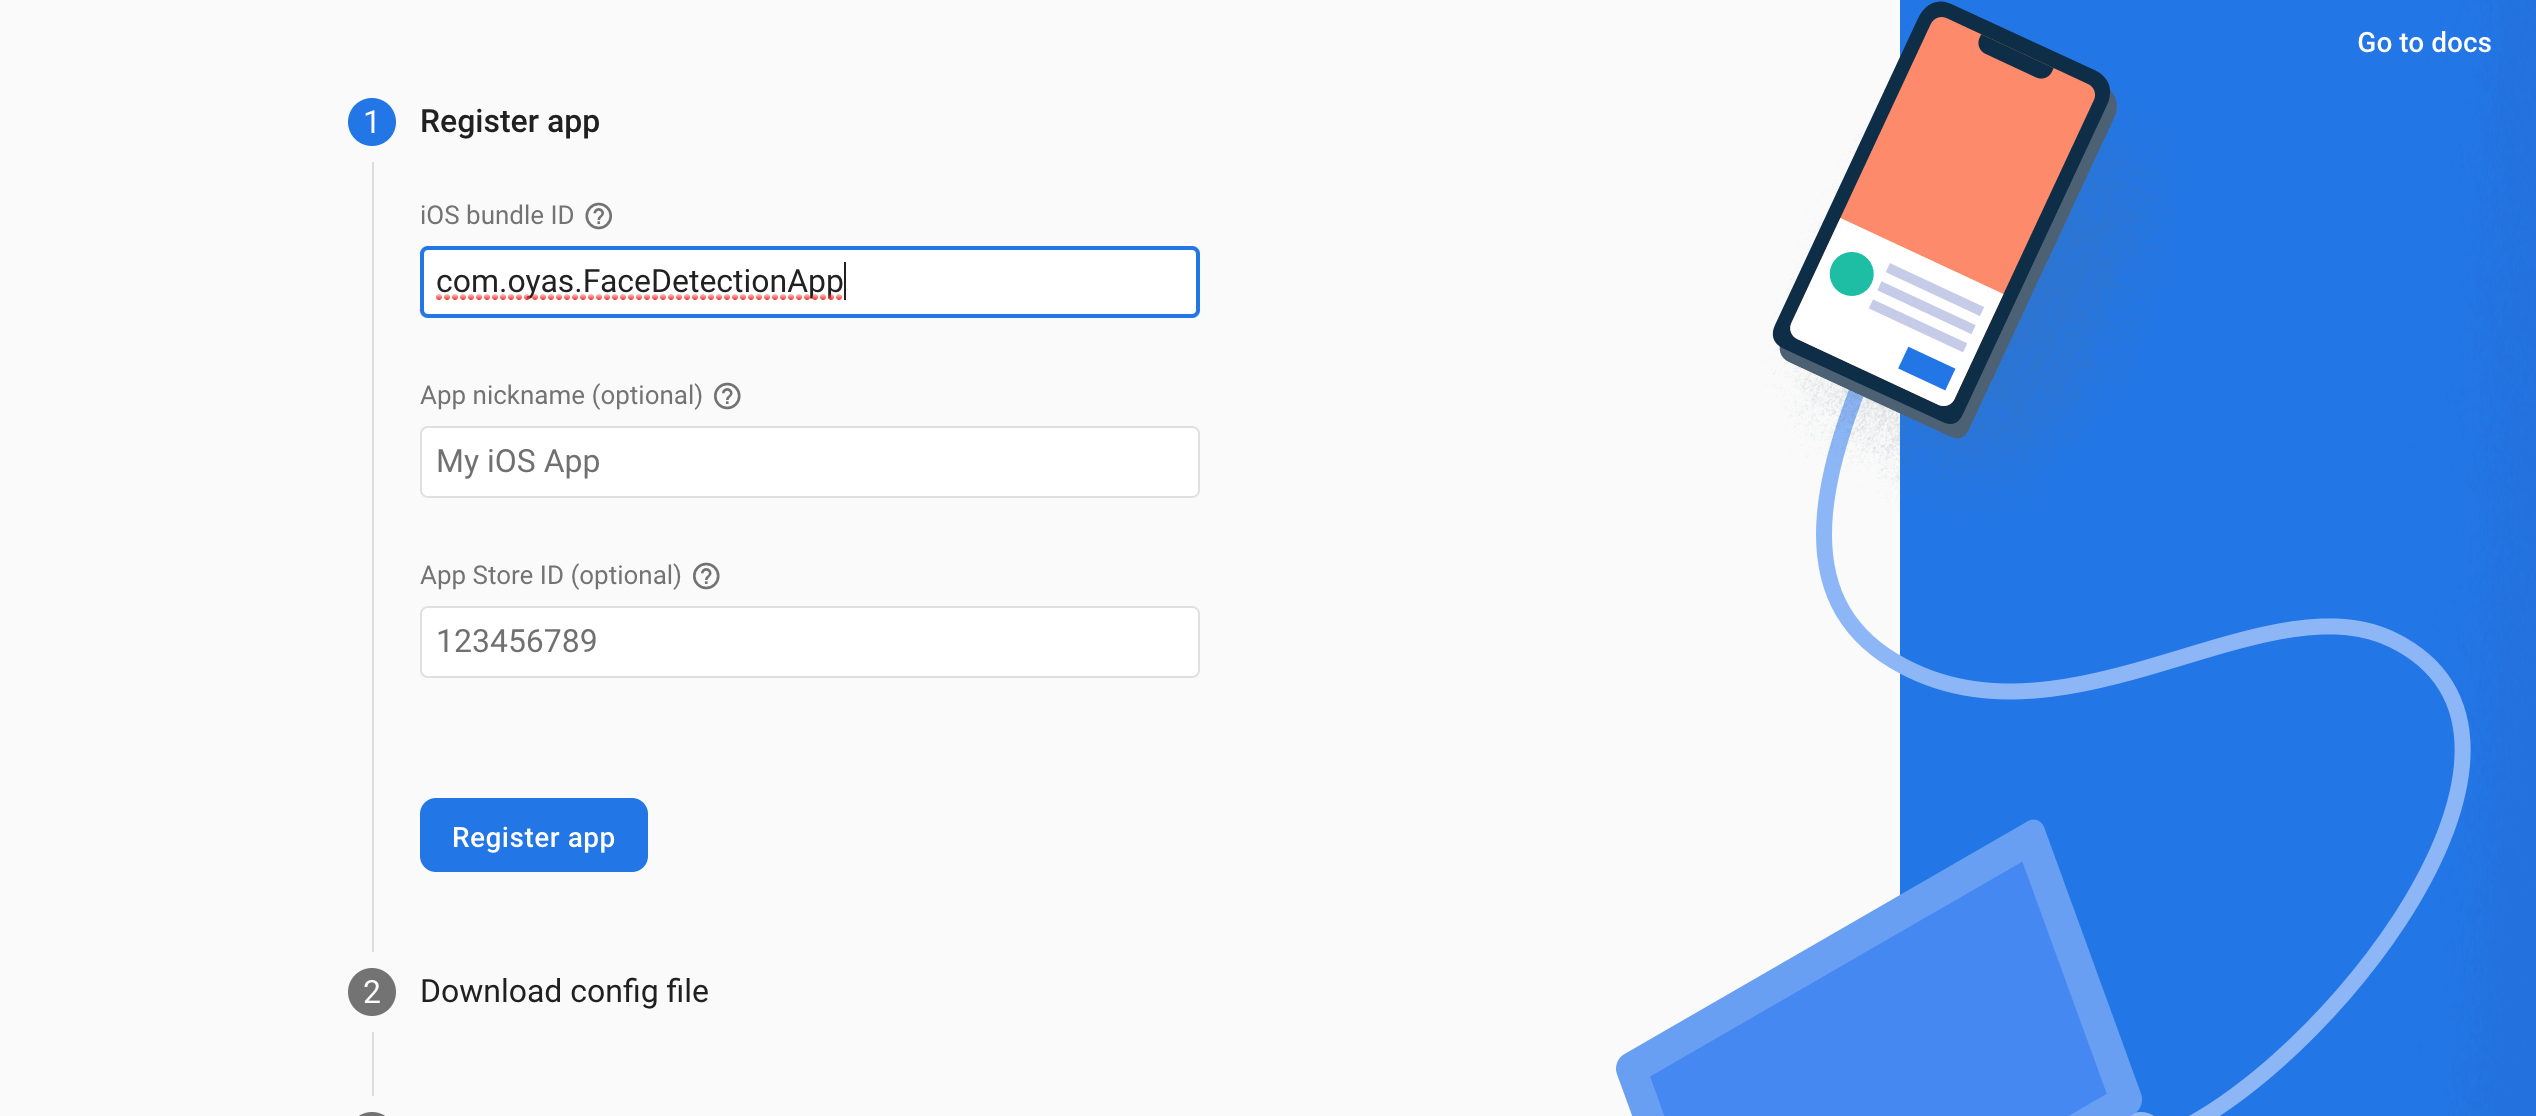
2 - Go to Firebase and create a Firebase project.
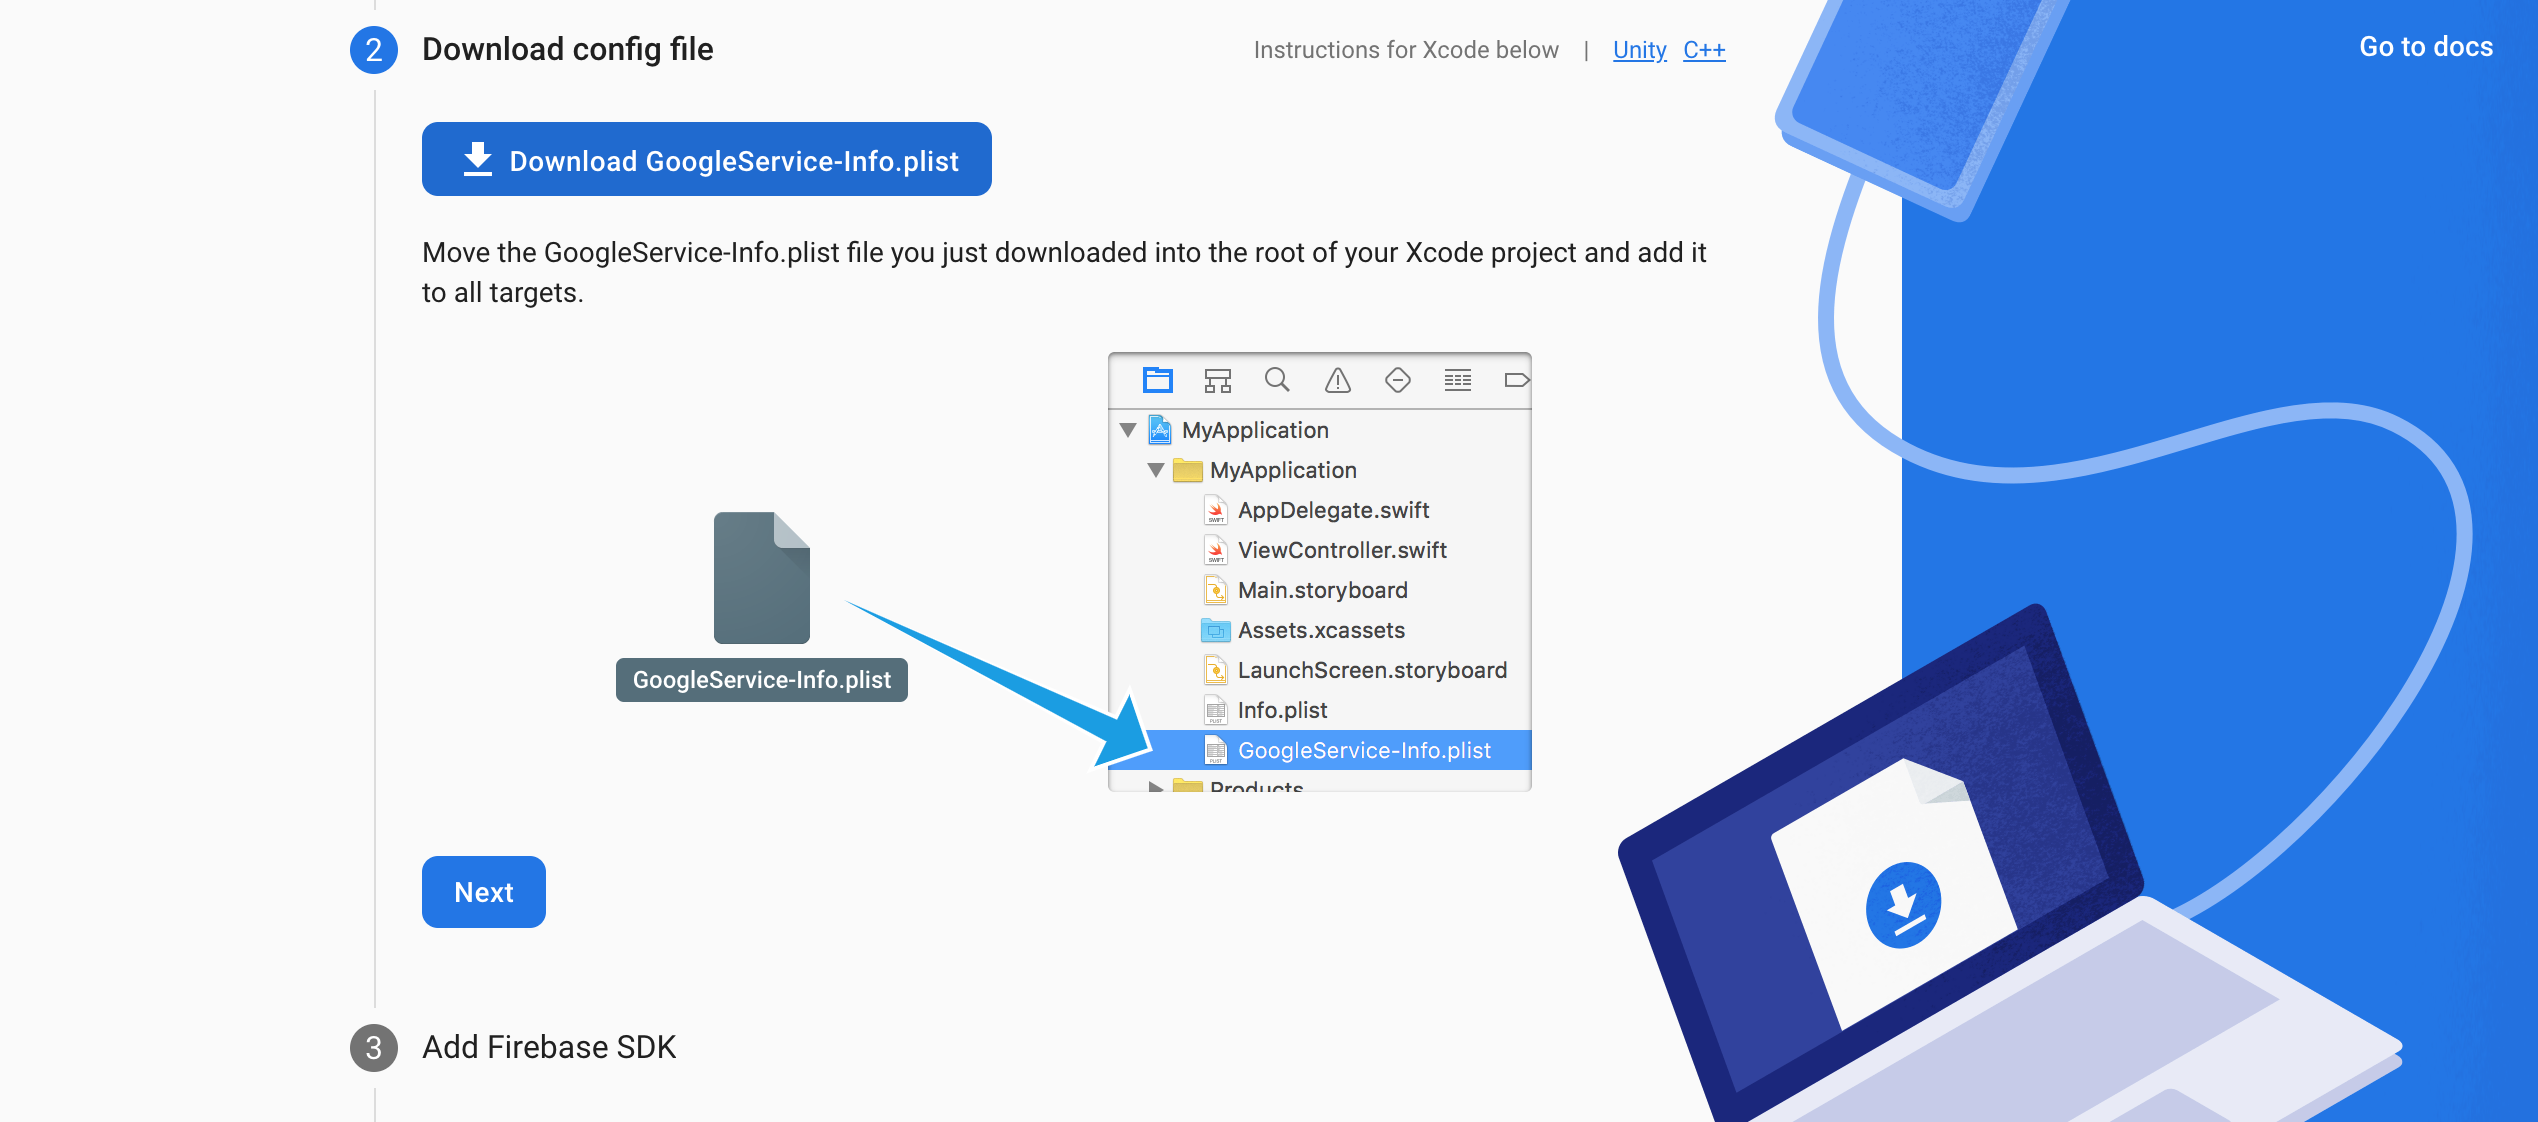
3 - Download GoogleService-Info.plist and add it to your Xcode project.
 Once you create Firebase project, run the following command in your terminal to create Podfile.
FaceDetectionApp $ pod init
4 - Inside the Podfile, install MLVision dependencies
# Uncomment the next line to define a global platform for your project
# platform :ios, '9.0'

target 'FaceDetectionApp' do
  # Comment the next line if you don't want to use dynamic frameworks
  use_frameworks!

  # Pods for FaceDetectionApp
  pod 'Firebase/MLVision', '6.25.0'
  pod 'Firebase/MLVisionFaceModel', '6.25.0'

  target 'FaceDetectionAppTests' do
    inherit! :search_paths
    # Pods for testing
  end

  target 'FaceDetectionAppUITests' do
    # Pods for testing
  end

end
FaceDetectionApp $ pod install
5 - Open FaceDetectionApp.xcworkspace file and configure Firebase insideAppDelegate file.
import UIKit
import Firebase

@main
class AppDelegate: UIResponder, UIApplicationDelegate {

    func application(_ application: UIApplication, didFinishLaunchingWithOptions launchOptions: [UIApplication.LaunchOptionsKey: Any]?) -> Bool {
        // Override point for customization after application launch.
        FirebaseApp.configure()
        return true
    }
Step2. Create AVFoundation object
Firebase ML Kit has a face detection feature that calculates the probability of smiling. In this case, 0.6 or more is is what we consider smiling.
import UIKit
import AVFoundation
import Firebase

class VideoCapture: NSObject {
    private let captureSession = AVCaptureSession()
    var handler: ((CMSampleBuffer) -> Void)?
    var isSmiling: Bool?
    private lazy var vision = Vision.vision()

    lazy var options: VisionFaceDetectorOptions = {
        let options = VisionFaceDetectorOptions()
        options.performanceMode = .accurate
        options.landmarkMode = .all
        options.classificationMode = .all
        return options
    }()

    override init() {
        super.init()
        setup()
    }

    func setup() {
            captureSession.beginConfiguration()
            let device = AVCaptureDevice.default(.builtInWideAngleCamera, for: .video, position: .front)
            guard
                let deviceInput = try? AVCaptureDeviceInput(device: device!),
                captureSession.canAddInput(deviceInput)
                else { return }
            captureSession.addInput(deviceInput)

            let videoDataOutput = AVCaptureVideoDataOutput()
            videoDataOutput.setSampleBufferDelegate(self, queue: DispatchQueue(label: "mydispatchqueue"))
            videoDataOutput.alwaysDiscardsLateVideoFrames = true

            guard captureSession.canAddOutput(videoDataOutput) else { return }
            captureSession.addOutput(videoDataOutput)

            for connection in videoDataOutput.connections {
                if connection.isVideoOrientationSupported {
                    connection.videoOrientation = .portrait
                }
            }

            captureSession.commitConfiguration()
        }

        func run(_ handler: @escaping (CMSampleBuffer) -> Void)  {
            if !captureSession.isRunning {
                self.handler = handler
                captureSession.startRunning()
            }
        }

        func stop() {
            if captureSession.isRunning {
                captureSession.stopRunning()
            }
        }
    }

extension VideoCapture: AVCaptureVideoDataOutputSampleBufferDelegate {
    func captureOutput(_ output: AVCaptureOutput, didOutput sampleBuffer: CMSampleBuffer, from connection: AVCaptureConnection) {
        if let handler = handler {

            let faceDetector = vision.faceDetector(options: options)
            let image = VisionImage(buffer: sampleBuffer)
            faceDetector.process(image) { faces, error in
                guard error == nil, let faces = faces, !faces.isEmpty else {
                    return
                }

                print("faces", faces)

                for face in faces {
                    if face.hasSmilingProbability {
                        let smileProb = face.smilingProbability
                        print("smileProb", smileProb)
                        if smileProb >= 0.6 {
                            self.isSmiling = true
                        } else {
                            self.isSmiling = false
                        }

                    }
                }
            }

            handler(sampleBuffer)
        }
    }
}
Step3. Create View with Swift UI
import SwiftUI
import AVFoundation

struct ContentView: View {
    let videoCapture = VideoCapture()
        @State var image: UIImage? = nil
        var body: some View {
            if videoCapture.isSmiling == true {
                Text("Smiling 😄")
            } else if videoCapture.isSmiling == false {
                Text("Normal 🙁")
            } else {
                Text("")
            }
            VStack {
                if let image = image {
                    Image(uiImage: image)
                        .resizable()
                        .scaledToFit()
                }
                HStack {
                    Button("Start") {
                        videoCapture.run { sampleBuffer in
                            if let convertImage = UIImageFromSampleBuffer(sampleBuffer) {
                                DispatchQueue.main.async {
                                    self.image = convertImage
                                }
                            }
                        }
                    }
                    Button("Stop") {
                        videoCapture.stop()
                    }
                }
                .font(.largeTitle)
            }
        }

        func UIImageFromSampleBuffer(_ sampleBuffer: CMSampleBuffer) -> UIImage? {
            if let pixelBuffer = CMSampleBufferGetImageBuffer(sampleBuffer) {
                let ciImage = CIImage(cvPixelBuffer: pixelBuffer)
                let imageRect = CGRect(x: 0, y: 0, width: CVPixelBufferGetWidth(pixelBuffer), height: CVPixelBufferGetHeight(pixelBuffer))
                let context = CIContext()
                if let image = context.createCGImage(ciImage, from: imageRect) {
                    return UIImage(cgImage: image)
                }
            }
            return nil
        }
}

struct ContentView_Previews: PreviewProvider {
    static var previews: some View {
        ContentView()
    }
}
That's all the code you need. Check it on your iPhone.
Github: https://github.com/akaakoz/FaceDetectionApp
Reference: Firebase ML Kit document